Cara mudah membuat Menu Flash Horizontal

Kali ini saya akan mengajarkan beberapa trik kepada anda mengenai bagaimana Caranya Membuat Menu Flash Horizontal menggunakan Macromedia Flash Player.

Tutorial ini, saya akan menggunakan ActionScript 3 untuk animasinya. Dalam tutorial ini kami juga akan menggunakan varian warna pada menunya. berikut contohnya

Bagus Bukan. Mari kita buat bersama.

Catatan : Anda memerlukan TweenMax untuk menyempurnakan hasilnya nanti.

1. Buat sebuah dokumen Flash baru berukuran 400×100
2. Kemudian buatlah sebuah objek persegi panjang tanpa stroke apapun. Saya menggunakan nilai 3 ( untuk sudut dibulatkan ), kemudian untuk ukuran Persegi Panjang tidak masalah. nanti bisa diubah melalui ActionScript
3. Konvert Persegi panjang ke Klip Movie, beri nama “Button Background” dan atur pint utama ke tengah. berikut bagaimana persegi panjang saya terlihat.

4. Berikan nama dari Klip Movie Latar belakang tombol misal, “buttonBackground”
5. Kemudian nama dari Layer “button bakground”. Kemudian buat layer baru dengan nama “buttons”
6. Di Layer “buttons”, buat kolom teks statis dan ketik “home” di dalamnya. Saya menggunakan ukuran font 21. buat kolom teks yang berukuran sama persis dengan teks yaitu (no extra space)
7. konvert kolom teks ke klip movie. berikan nama “Home Button” dan registration point ke pusat

8. Sekarang buat 3 atau lebih menu persis seperti langkah no 5 dan 6. Terserah anda. Jika sudah terkumpul, nantinya akan terlihat seperti dalam daftar berikut

9. Ratakan semua button ke horizontal

10. Sekarang beri nama misal, tombol “homeButton“, “portfolioButton“, “aboutButton” dan “contactButton“.

Memindahkan ke ActionScript 3

11. Buat Layer baru untuk ActionScript dan ketik seperti kode di bawah

//Import TweenMax
import gs.*;
import gs.plugins.*;
TweenPlugin.activate([BlurFilterPlugin]);

//Add the buttons into an array
var buttonsArray:Array = new Array(homeButton,portfolioButton,aboutButton,contactButton);

//Loop through the buttons array
for (var i:uint = 0; i <>

//Add event listeners for the button
buttonsArray[i].addEventListener(MouseEvent.MOUSE_OVER, mouseOverButton);
buttonsArray[i].addEventListener(MouseEvent.CLICK, buttonClicked);
}

//Move the buttonBackground under the home button (= starting position)
buttonBackground.x = homeButton.x;
buttonBackground.y = homeButton.y;

//Make the buttonBackground a bit bigger than the home button
buttonBackground.width = homeButton.width + 10;
buttonBackground.height = homeButton.height + 10;

//Tween the buttonBackground to a random color using TweenMax
TweenMax.to(buttonBackground, 0.1, {tint: Math.random() * 0xffffff});

//This function is called when the mouse is over a button
function mouseOverButton(e:Event):void {

//Assign the button to a local variable
var button:MovieClip = (MovieClip)(e.target);

//Calculate the new target width and height for the buttonBackground
var targetWidth:Number = button.width + 10;
var targetHeight:Number = button.height + 10;

//Tween the buttonBackground's position, size and color (color is random)
TweenMax.to(buttonBackground, 0.5, {x: button.x, y: button.y,
width:targetWidth, height:targetHeight, tint: Math.random() * 0xffffff});
}

//This function is called when a button is clicked
function buttonClicked(e:Event):void {

//Add your logic here!
trace(e.target.name + " was clicked!");
}

12. Sekarang menu Flash horizontal Anda sudah siap! Silakan tes film Anda. Anda bebas untuk menggunakan menu ini mana pun yang Anda inginkan jika Anda merasa berguna!


Sumber: http://akhatam.com/cara-mudah-membuat-menu-flash-horizontal/
READ MORE»

Add Favicon to Url Blog Address

How about the step to do that? this is the steps :

  1. First you must have an image, for example like this:

    add favicon to blog

  2. After that, you must change your image to be icon. For do that, you can use favicon Generator, please check out http://www.favicongenerator.com


  3. Click at the "Browse..." button.


  4. Insert your image which will change into favicon.


  5. Click at "Generate Favicon!" button.


  6. After the process is complete, click at "Click Here to Download your favicon".


  7. Save into your computer.


  8. Next step is you must upload your Favicon to image hosting. You can use google page or other One.

  9. Now I assume you have had the URL address of your favicon. For example, I have a favicon URL address like this :


  10. http://www.geocities.com/image/favicon.ico

  11. You must change the favicon URL address to be like this :


  12. <link rel="shortcut icon" href="http://www.geocities.com/image/favicon.ico"/>

  13. Next step is login to blogger with your ID.


  14. Click at "Layout".


  15. Click at "Edit HTML" tab.


  16. Click at "Download full template" link. Save your template into computer (importan !):


  17. Find the code :


  18. Place your "Favicon code" below of . For example :


  19. <link rel="shortcut icon" href="http://www.geocities.com/image/favicon.ico"/>

  20. Click "Save Template" button.


  21. Done. Now you have favicon at your blog URL addres.
Thank to Kang Rohman
READ MORE»

Reducing the size of an image file with punypng

Often in making the posting is usually included an image or multiple images to attract the visitors. The problem is that the image size is so large that eventually will add to the burden of blogs that aggravate during loading. And also if it was scaled down size will reduce the image quality. There are ways to reduce the file size of images without reducing image quality by using punypng. With this punypng image will be reduced in size up to 41% and also will automatically change the image file of the GIF and JPEG files into PNG files. Thus will not reduce the image quality such as sharpness of the color. For those who want to try, go directly to the punypng site:

How to convert the image:

1. Open punypng site.
2. Click Upload Image.
3. Next locate the file image will be resized and then Open.
4. Punypng will automatically resize and change the image and the PNG file. When finished will appear before the image size and image size and how many percent after the image size is reduced.
5. Then Download images and save to your computer. Congratulations you have resized image. Look at the difference.


READ MORE»

How to Make Spoiler In Blog

Spoiler is usually used to reduce or shorten the code, post, or any writing not to be too filled pages. This spoiler can install on the side bar, post pages, headers and footers. To make it is not hard, you live copied code below.

Here's an example spoiler.

Spoiler EXAMPLE:


CONTOH SPOILER..


How to make this spoiler is as follows:
1.Copy and paste the code below

<div style="margin: 5px 20px 20px;">
<div class="smallfont" style="margin-bottom: 2px;"><b>Spoiler</b> Untuk lihat <b>Script</b>: <input value="Lihat" style="margin: 0px; padding: 0px; width: 55px; font-size: 11px;" onclick="if (this.parentNode.parentNode.getElementsByTagName('div')[1].getElementsByTagName('div')[0].style.display != '') { this.parentNode.parentNode.getElementsByTagName('div')[1].getElementsByTagName('div')[0].style.display = ''; this.innerText = ''; this.value = 'Close'; } else { this.parentNode.parentNode.getElementsByTagName('div')[1].getElementsByTagName('div')[0].style.display = 'none'; this.innerText = ''; this.value = 'Show'; }" type="button">
</div>
<div class="alt2" style="border: 1px inset ; margin: 0px; padding: 6px;">
<div style="display: none;">

Isi kode script, HTML dan teks anda disini

<br>
</div>
</div>
</div>

2. Next replace the writing and bold black and red.
Width: 55px is the width of spoiler box. Change according to your needs.
font-size: 11px is the font size dalan spoiler box. Can be replaced as needed.
Cover and See can you replace your own
Isi kode script, HTML dan teks anda disini can change it.
Please try...!!


READ MORE»

Learning SEO on Forum

Many tricks about Seo which must be learned. In order for a web / blog you are in the first compiled the search engines, especially Google. How Do you understand about Seo?

A new seo forum was launched this week with the name "forum negeriku", can be a means of discussion and studying very good for us - we are beginners in the SEO world

Experts - SEO experts are waiting you and will respond and share knowledge with you. Come and Join here!

(resep.web.in)


READ MORE»

Making Tags on Blogger

It seemed a very long time not talking about blogs. After many weeks filled with a variety of tasks and finally today I got a chance to share again.

As we know, especially for the bloggers, Making or Creating tag is not difficult if we use wordpress, because it has provided tools to make a tag. But for bloggers of course that's a little strange because blogger do not provide it.

Got confused as well how to create tags in blogger. Turns out easily. To create a tag on blogger we need the browser we have to use Mozilla Firefox then you must install an additional extension called Greasemonkey. 've Finished installing the software? Get to the final stage of CLICK HERE

It is finished. Then later when you want to post, there will be an additional list as shown below.


To add tags, Make each tag separated by a comma (,) and when it is finished, we click the first Append Tags. Ok done live click post. So the next tag will be automatically added to Technorati.

READ MORE»

How to put music in your blog

Music in the blog. you may never get a blog with live music by itself. how do you think the blog is like it, if you are interested in creating your blog is like that.

Whatever your story, if you are interested to enter the music into blogs, you live copy the following code.

<img style="visibility: hidden; width: 0px; height: 0px;" src="http://counters.gigya.com/wildfire/IMP/CXNID=2000002.0NXC/bT*xJmx*PTEzMjczMzI1NDAyOTYmcHQ9MTMyNzMzMjc5MzY1NiZwPTU2MjAxMiZkPSZnPTEmbz*zNzJkZDYwMmQ1MGY*YTg5YWY2/YmI1NzIzODNlYWFkYiZvZj*w.gif" width="0" border="0" height="0" /><div align="left"><table style="border-collapse: collapse;" id="autoplaylist" width="304" bgcolor="#000000" border="0" bordercolor="#111111" cellpadding="0" cellspacing="0"><tbody><tr><td align="center"><a href="http://www.autoplaylist.com/"><img src="http://img34.imageshack.us/img34/1521/topaag.gif" title="Automatic Created Playlist by www.autoplaylist.com" alt="Automatic Created Playlist by www.autoplaylist.com" width="304" border="0" height="19" /></a></td></tr><tr><td align="center"><embed src="http://kodelagu.net/player2010.swf" allowscriptaccess="always" allowfullscreen="true" flashvars="&amp;file=http%3A%2F%2Fwww.autoplaylist.com%2Fembed%2FrelatedAudio.php%3Fid%3D536b553067594d6c596330%26name%3D594120524153554c414c4c4148%26type%3DAudio&amp;config=http%3A%2F%2Fwww.autoplaylist.com%2Fembed%2FrandomAudio.swf" width="304" height="200"></embed></td></tr><tr><td align="center"><a href="http://www.autoplaylist.com/list.php?type=Audio&amp;id=SkU0gYMlYc0&amp;name=YA_RASULALLAH"><img src="http://img405.imageshack.us/img405/7881/botton.gif" title="Make Your Own Mp3 &amp; Video Playlist at www.autoplaylist.com" alt="Make Your Own Mp3 &amp; Video Playlist at www.autoplaylist.com" width="304" border="0" height="19" /></a></td></tr></tbody></table></div>


This code is for the song of Samy yusuf on title Ya RASULULLAH. if for example you want to add songs to your liking, then stay to visit sites that provide services embed code. one of the site that provide this code is www.musik-live.net
READ MORE»

How to Easily Create and Adding Meta Tags in Blog

One way to optimize your blog in Google search engine list is to create and add a meta tag inside the HTML code blog. For this step you will not be an expert in HTML, because it is easy to any beginner bloggers can add Meta tags on the blog.

To add meta tags we can use a tool that aids in http://tools.seobook.com/meta-medic/ site.

Steps Creating and Adding a meta tag:
1. Sign kesitus by clicking the link.

2. In the Title field blank.

3. In the Description field fill your blog description.

For example: Blog where learning to make blogs and decorating blogs.

4. In the Keywords field, fill in the keyword or keywords that you seek, for example, because of your blog about blog tutorial you enter this keyword: Blogs, learning, ornamental, templates, create.

5. Click the Create button META tags.

6. Copy the results of a meta tag creation tool.

7. Log into your blogger dashboard. Log in to the menu layout or the layout blog, select the Edit HTML sub-menu.
8. Find the following code in your blog's html:

<title> </title> complitly like this <title><data:blog.pageTitle/></title>

9. Then paste or add the meta tag code below script
it. To become like this. Do not forget to add a slash (/) at the end of the meta tag.

<title><data:blog.pageTitle/></title>
<meta name="Description" content="Blog tempat belajar membuat blog dan menghias blog.">
<meta name="Keywords" content="Blog, belajar, hias, template, buat."/>

10. Final step we do is save the changes to this template by pressing the Save Template button. Done.

You also can to try this technique how boost traffic to new blog

Happy blogging....:)
READ MORE»

How to Protect Your Blog from Plagiarism unwanted

Hii all friend bloggers. on the first day of this new year 2010 aceh Ubaid will make the posting about "how to protect your blog from plagiarism unwanted".

This adult blog is growing rapidly. everywhere, so very many possibilities for new bloggers for tracing your blog as blogs, or as the contents of this blog content. Here we have tips to protect our blogs of plagiarism in the not wanted.

Want to know how? Just follow the following tips "to protect the blog from plagiarism".

The first log in to your blogger, then do not forget to check the "expand widgets". Your next search <body> code, already can? The next steps are:
enter the following code after the body text.

oncontextmenu='return false' onmousedown='return false' onselectstart='return false'

So, it is code be like this <body oncontextmenu='return false' onmousedown='return false' onselectstart='return false'>

OK, understand?. finish here before the tips blogging from aceh ubaid, see you next time. :):D
READ MORE»

How to blogging On Facebook using Notes

you already have a facebook account? I think all of us who frequent online already have an account on facebook. Here I will share know my friends all for blogging by using the facebook application. application is that? It is nites, with a pad we can use it to write what we want and then we are publishing on our facebook.

Ok, ready to start making notes blog on facebook. Let us learn to make it right.

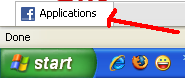
1. Click the facebook application, it was right in the left corner of facebook, at the bottom. for details, see the picture


2. After that, you are looking for facebook application "notes", and click there


3. Then Click the Notes at the right or at the middle of facebook
at "Write a New Note"

4. At the page of "Write a New Note", look the following and fill it all.


5. If you already, click "publish"


7. at the last. click pulish one again, as you look below


READ MORE»

How to Make Highlight Author Comment

Highlight Author Comment function is to comment author (blog owner) is different from other people comment. Examples can be seen on this blog. To comment the blog owner will have no effect it border and others. Here I will lay out ways to make this Highlight Comment Author. now we see how to make Highlight Author Comment lets gooooooooooooo:)

1. Log in to blogger then open "Layout --> Edit HTML"
2. Check sign at "Expand Widget Templates"
3. Copy this script code before code ]]> or copy to css.

.comment-body-author {
background: #E6E6E6; /* Warna Background */
border-top: 1px dotted #223344;border-bottom: 1px dotted #223344;border-left: 1px dotted #223344;border-right: 1px dotted #223344;
margin:0;
padding:0 0 0 20px;
}

4. Then search the codes as follows. Perhaps the code in your HTML will be different, although different tp try as closely as possible with the following code:

<dl id='comments-block'>
<b:loop values='data:post.comments' var='comment'>
<dt class='comment-author' expr:id='"comment-" + data:comment.id'>
<a expr:name='"comment-" + data:comment.id'/>
<b:if cond='data:comment.authorUrl'>
<a expr:href='data:comment.authorUrl' rel='nofollow'><data:comment.author/></a>
<b:else/>
<data:comment.author/>
</b:if>
said...
</dt>

<b:if cond='data:comment.author == data:post.author'>
<dd class='comment-body-author'>
<p><data:comment.body/></p>
</dd>
<b:else/>

<dd class='comment-body'>
<b:if cond='data:comment.isDeleted'>
<span class='deleted-comment'><data:comment.body/></span>
<b:else/>
<p><data:comment.body/></p>
</b:if>
</dd>

</b:if>

<dd class='comment-footer'>
<span class='comment-timestamp'>
<a expr:href='"#comment-" + data:comment.id' title='comment permalink'>
<data:comment.timestamp/>
</a>
<b:include data='comment' name='commentDeleteIcon'/>
</span>
</dd>
</b:loop>
</dl>

5. Red code is the code that you have to add in your HTML. Position must be true, remember that.
6. If so, keep on the save your template.

These authors comment on the profile of the blog owner. Thus, so the effect appears before you have to comment on the blogger log in OK.
This only reply to the comments box of pure bloggers. Happy blogging :)
READ MORE»

How to Make Your Posting Published Automatically at Blogger (blogspot)

Hi, all blogger friends!, on the posting this time I will try to make a blog posting about posting automatically. This automatically posting is very important I think, because this is will help the blogger on making the blog post on the Scala.

the important is posting blog will published routinely as we want, we can arrange posting date, time.

Features a blog posting in automatic is very important for you that can not be online 24 hours. so, you can create multiple job postings at once, then set your date and time you want to published it or out posting in your blog.

interest!!. lets follow the following step for making the automatically posting at blogger (blogspot).


1. LOg in to your blogger account, and the write your posting, as the picture above

2. If you have finish your posting, then arrange the open at "post option", it get at the left corner.


3. Then, you look at the right corner, "post date and time", you can arrange it, arrange the date posting and the time for displaying the posting.


READ MORE»

16 Ways to boost traffic to your blog that you need to know

There are many ways that we can do to boost traffic to the blog. and iu depends on the results of each observation, but if we search the internet there was a way to boost traffic to the blog.

certainly we have to keep doing my best to blog that we are not cultivated in vain. The following are some ways, at least 16 ways to boost traffic to your blog based on the observed practice of the webmaster, and most who use this method has been able to boost blog traffic.

You've got your blog set up and you've started posting pithy, useful information that your niche market would benefit from and enjoy. Days go by, you keep publishing, but no one comments and your traffic stats are barely registering. What do you do?

Like any website you own, you must do some blog promotion to start driving traffic to your site. Here are 16 steps, in no particular order of importance, that you can start doing now to get traffic moving to your blog.

1. Set up a Bloglet subscription form on your blog and invite everyone in your network to subscribe: family, friends, colleagues, clients, associates.

Http://www.bloglet.com

2. Set up a feed on MyYahoo.com so your site gets regularly spidered by the Yahoo search engine (see tutorial on http://www.biztipsblog.com)

http://www.my.yahoo.com

3. Read and comment on other blogs that are in your target niche. Don't write things like "nice blog" or "great post." Write intelligent, useful comments with a link to your blog.

4. Use Ping-o-matic to ping blog directories. Do this every time you publish.

http://www.pingomatic.com

5. Submit your blog to traditional search engines:
http://www.submitfire.com

6. Submit your blog to blog directories. The most comprehensive list of directories is on this site:

http://www.masternewmedia.org/rss/top55/

Tip: Create a form to track your submissions; this can take several hours when you first start so schedule an hour a day for submitting or hire a VA to do it for you.

7. Add a link to your blog in your email signature file.

8. Put a link to your blog on every page of your website.

9. If you publish a newsletter, make sure you have a link to your blog in every issue.

10. Include a link to your blog as a standard part of all outgoing correspondence such as autoresponder sequences, sales letters, reports, white papers, etc.

11. Print your blog URL on your business cards, brochures and flyers.

12. Make sure you have an RSS feed URL that people can subscribe to.
The acronym RSS means Rich Site Summary, or some may consider its meaning as Really Simple Syndication. It is a document type that lists updates of websites or blogs available for syndication. These RSS documents (also known as 'feeds') may be read using aggregators (news readers). RSS feeds may show headlines only or both headlines and summaries.

To learn how news aggregators/RSS readers work, see this site: http://www.rss-specifications.com/rss-readers.htm

13. Post often to keep attracting your subscribers to come back and refer you to others in their networks; include links to other blogs, articles and websites in your posts

14. Use Trackback links when you quote or refer to other blog posts. What is TrackBack? Essentially what this does is send a message from one server to another server letting it know you have posted a reference to their post. The beauty is that a link to your blog is now included on their site.

15. Write articles to post around the web in article directories. Include a link to your blog in the author info box (See example in our signature below).

16. Make a commitment to blog everyday. 10 minutes a day can help increase your traffic as new content attracts search engine spiders. Put it on your calendar as a task every day at the same time.

resource: http://ezinearticles.com/?16-Ways-to-Drive-Traffic-to-Your-Blog

READ MORE»

Displaying date posting on the same day at Blogger

By default blogspot can not display date posting on the same day. And this sometimes interfere with consistency in a layout. For that to appear date post on the same day, we must add/replaced with a new script. I got this script on this blog (catalog-tutorial.blogspot.com).

to make this segment are very easy, you enough follow the following technique or way.

First: You log in to your blog, and dont forget for back up your template before, it is for guard your lose template.
second: Check the expand widget at EDIT HTML at your blog
Third: Seek for the HTML below

<b:if cond='data:post.dateHeader'>
<h2 class='date-header'><data:post.dateHeader/></h2>
</b:if>


Fourth: Change the HTMl with this one The following)

<b:if cond='data:post.dateHeader'>
<script>var ultimaFecha = &#39;<data:post.dateHeader/>&#39;;</script>
<h2 class='date-header'><data:post.dateHeader/></h2>
<b:else/>
<h2 class='date-header'>
<script>document.write(ultimaFecha);</script>
</h2>
</b:if>

Fifth Enjoy blogging :D

want to see the POsting before about promote your blog Promote blog using facebook

READ MORE»

Blog anda tampil dengan efek salju

Anda ingin membuat blog anda dengan efek salju, menampilkan efek salju di blog. keren memang bisa membuat blog dengan efek salju. karena blog anda akan hadir dengan tampilan yang anggun dan tambah menarik.

Want to know how to put the effects of snow on the blog to view your blog so looks more interesting as you see on my blog.

If you want to try follow the steps below:

1. Log in to Blogger ----> click Edit HTML Layout
2. Find Code . If you already see, Copy and Paste the following code at the bottom:

<script src='http://devil32.co.cc/titip/snow.js' type='text/javascript'>
</script>

3. Save and see the results,

please try, if successful give comments
READ MORE»

Widget postingan terbaru sekaligus menampilkan gambar dan page view dan jumlah komentar

Hai sobat-sobat yang berbahagia (alaah kayak pidato aja), kali ini kita akan melihat sebuat tip blogger yang menarik yaitu: cara membuat widget untuk menampilkan postingan terbaru sekaligus bisa menampilkan jumlah page view dan jumlah komentarnya lhoo, gimana? menarik kan!. jadi penjelasana gini.

Widget ini selain menampilkan postingan terbaru, ia juga menampilkan gambar pada postingan tersebut andaikata postingan anda ada gambarnya, dan juga bisa melacak banyaknya komentar pada postingan tersebut.


jadi kita tidak perlu lagi capek-capek melihat komentar per postingannya, serta jumlah page view (jumlah halam tersebut dilihat atau dibuka user), nha mantap kan!!. bagi anda yang pingin membuatnya atau menambah di sidebar blog anda silakan ikuti saya untuk membuat widgetnya.

Caranya adalah sama seperti teknik-teknik lainnya, yaitu dengan cara anda log in dulu, kemudian pada halaman dashboard anda pilih layout, kemudian add gadget, kemudian anda pilih HTML/Javascript untuk memasang widget ini. caranya sangat mudah, anda tinggal copy paste semua code dibawah ini, pastekan kode tersebut kedalam HTML/Javascript blog anda. Bagi pengguna wordpress mungkin juga bisa tinggal copy-paste aja kodenya.

<script language="JavaScript">

imgr = new Array();

imgr[0] = "http://i683.photobucket.com/albums/vv193/vebyo/No-Image-stat.gif";

imgr[1] = "http://i683.photobucket.com/albums/vv193/vebyo/No-Image-stat.gif";

imgr[2] = "http://i683.photobucket.com/albums/vv193/vebyo/No-Image-stat.gif";

imgr[3] = "http://i683.photobucket.com/albums/vv193/vebyo/No-Image-stat.gif";

imgr[4] = "http://i683.photobucket.com/albums/vv193/vebyo/No-Image-stat.gif";
showRandomImg = true;

boxwidth = 298;

cellspacing = 8;

borderColor = "#ffffff";

bgTD = "#000000";

thumbwidth = 40;

thumbheight = 40;

fntsize = 12;

acolor = "#666";

aBold = true;

icon = " ";

text = "comments";

showPostDate = false;

summaryPost = 40;

summaryFontsize = 10;

summaryColor = "#666";

icon2 = " ";

numposts = 5;

home_page = "http://namablog.blogspot.com/";

</script>

<script src="http://www.geocities.com/damn_lunchix/recentposts_thumbnail.js" type="text/javascript"></script>

Apa saja yang perlu anda ganti?
home_page : http://namabloganda.com/ (Ubah sesuai URL blog masing2-ini paling penting)

boxwidth - Ukuran Lebar Widget

cellspacing - Spasi diantara cells

borderColor - Warna Border

thumbwidth & thumbheight - Ukuran lebar dan tinggi gambar Thumbnails

fntsize - Ukuran Font pada title

acolor - Warna title

aBold - Tebal huruf pada title? (true=untuk tebal or false=untuk tidak tebal / biasa)

numposts - Jumlah recent post yang dita mpilkan? (tinggal ganti anggka 5 )


Yang terakhir anda jangan lupa Save template anda. setelah itu coba liat blog / website anda.

Note:
kalau gambar recent post nya enggak kelihatan, coba anda cek -> Setting -> Site Feed trus Allow Blog Feeds nya di ganti dengan full trus Post Feed Redirect ULRnya juga di kosongkan.


Kemudian Save lagi :) , and see your blogs posting. keep blogging
Apakah anda berhasil mencobanya, silakan berikan Commentarnya >>>>>>:)<<<<<

Dari: http://hitsuke.blogspot.com
READ MORE»

Membuat tampilan comment pemilik blog berbeda dengan orang lain

Anda pasti ingin comment anda pemilik blog jadi tampil berbeda dengan comment orang lain, nha ini disebut dengan highlight author comment. berikut saya akan membuat sebuat postingan supaya anda bisa membuat tampilan comment pemilik blog berbeda dengan orang lain.

Ok, let's follow me
1. Login ke blogger kemudian ke menu "Layout --> Edit HTML"
2. Beri tanda centang pada kotak "Expand Widget Templates"
3. Copy script berikut ini sebelum kode ]]></b:skin> atau copy ke dalam kode CSS.

.comment-body-author {
background: #E6E6E6; /* Warna Background */
border-top: 1px dotted #223344;border-bottom: 1px dotted #223344;border-left: 1px dotted #223344;border-right: 1px dotted #223344;
margin:0;
padding:0 0 0 20px;
}

4. Kemudian cari kode2 seperti berikut. Mungkin kode yg ada di HTML kamu akan beda, tapi walaupun berbeda usahakan semirip mungkin dengan kode berikut ini :

<dl id='comments-block'>
<b:loop values='data:post.comments' var='comment'>
<dt class='comment-author' expr:id='"comment-" + data:comment.id'>
<a expr:name='"comment-" + data:comment.id'/>
<b:if cond='data:comment.authorUrl'>
<a expr:href='data:comment.authorUrl' rel='nofollow'><data:comment.author/></a>
<b:else/>
<data:comment.author/>
</b:if>
said...
</dt>

<b:if cond='data:comment.author == data:post.author'>
<dd class='comment-body-author'>
<p><data:comment.body/></p>
</dd>
<b:else/>

<dd class='comment-body'>
<b:if cond='data:comment.isDeleted'>
<span class='deleted-comment'><data:comment.body/></span>
<b:else/>
<p><data:comment.body/></p>
</b:if>
</dd>

</b:if>

<dd class='comment-footer'>
<span class='comment-timestamp'>
<a expr:href='"#comment-" + data:comment.id' title='comment permalink'>
<data:comment.timestamp/>
</a>
<b:include data='comment' name='commentDeleteIcon'/>
</span>
</dd>
</b:loop>
</dl>

5. Kode yang berwarna merah adalah kode yang harus anda tambahkan di HTML anda. Posisinya harus benar, remember it ok.
6. Kalau sudah, save template kamu. lihat hasilnya

note: sebelum anda memberi atau membalas komentar kawan atau blogger lainnya, anda harus log in dulu pada blog anda, supaya comentar anda sebagai pemilik blog nampak berbeda dengan orang lain yang memberi komentar. Kalau anda berhasil, berikan komentar anda..!! happy blogging
READ MORE»

Cara Membawa traffic ke blog baru

Anda baru saja membuat sebuah blog? dan sekarang anda ingin blog anda diketahui orang banyak. mungkin yang menajadi masalah bagi anda bagaimana cara membawa traffic ke blog baru. memang sesudah kita membuat sebuah blog hal selanjutnya yaitu traffic, karena keberhasilan sebuah blog itu dilihat dari banyaknya traffic yang didapat suatu blog. Supaya blog anda diketahui orang banyak, tentu blog anda harus terindex di search engine dengan baik.

supaya blog terindex dengan baik, anda harus melihat tata cara pembuatan blog. mulai dari memilih nama domain dan judul blog anda. supaya mudah terindex oleh search engine usahakan dalam pembuatan judul blog ada kalimat atau kata-kata dari nama domain blog anda. Misalnya domain blog adalah Premaninternet.com, jadi dalam pembuatan judulnya usahakan minimal dua kali pengulangan kata-kata preman internet.

setelah itu, supaya mudah dalam membawa traffic ke blog, atau mudah terindex oleh search engine, anda harus memperhatikan meta tag yang letak nya di bawah header blog. meta tag adalah tag yang berfungsi untuk menjelaskan isi blog anda, sehingga search engine mudah dalam mengenal blog anda. contoh meta tag, anda lihat dibawah ini:

<meta name="keywords" content="Senarai Keywords" />
<meta name="description" content="Description Blog Anda" />


Meta tag dengan name=”description” digunakan untuk memberi penerangan
ringkas berkenaan Blog anda. Enjin Pencari kadangkala menunjukkan Meta
tag ini apabila Blog anda di index di SERP enjin pencari.

Meta tag dengan name=”Keywords” memberitahu enjin pencari, keyword
mana yang anda inginkan supaya enjin pencari mengindex kan Blog anda.

Ok, sampai disini, anda sudah paham. sekarang dimana anda harus meletakkan meta tag tersebut, sehingga mudah membawa traffic ke blog baru anda? anda harus meletakkan kedua meta tag tersebut seperti berikut ini:

<head>
<title><data:Blog.pageTitle/></title>

<meta name="description" content="Description Blog Anda" />
<meta name="keywords" content="Senarai Keywords" />

<b:skin><![CDATA[*/


Untuk lebih jelas, coba anda lihat screen shot berikut ini
READ MORE»
Copyright 2011 Looking News - Template by Kautau Dot Com